
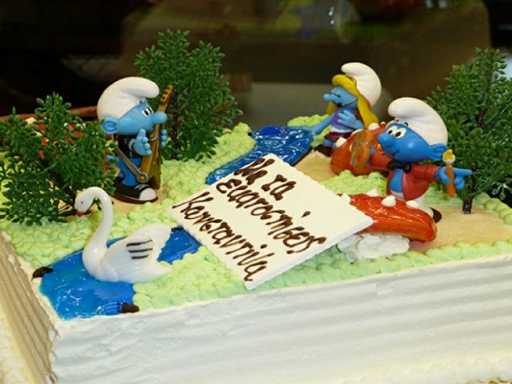
- Rupert: I want a birthday cake!
- Us: But, Rupert, it’s not your birthday yet…
- Rupert: I’m a bear, I can eat cake anytime I want!
- Us: Rupert, that’s no good for your health!
- Rupert: Winnie the Pooh eats honey all day long and he looks just fine!
- Us: Pooh is a cartoon, if you haven’t noticed…
- Rupert: Potato, potato… I went climbing in the woods, I deserve a dessert!

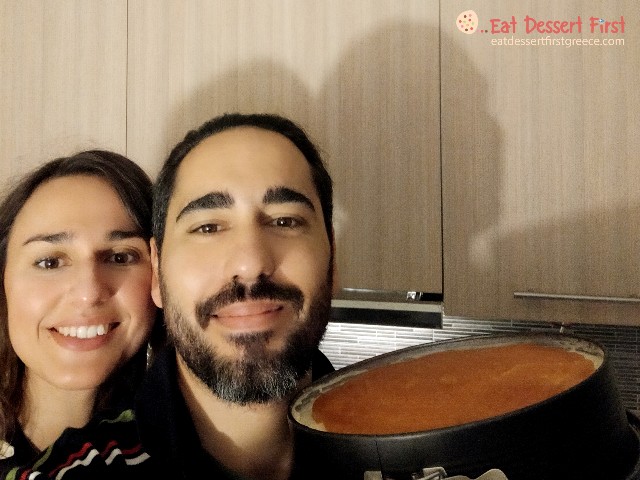
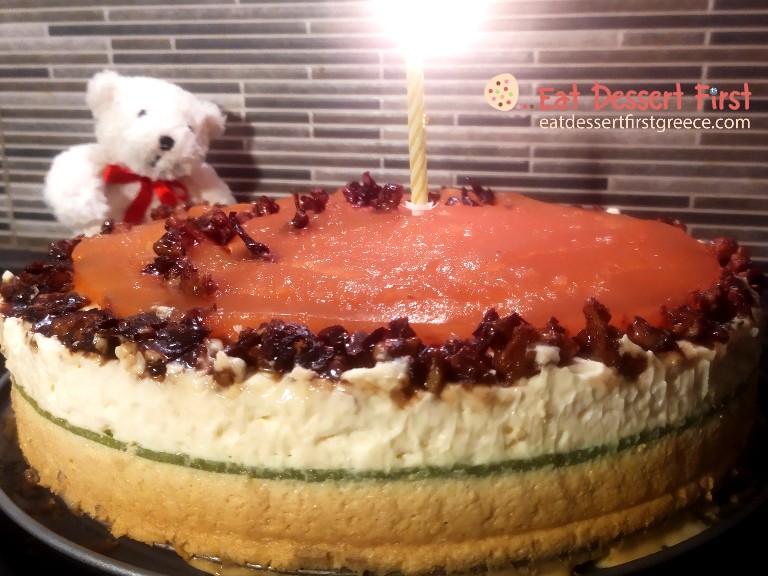
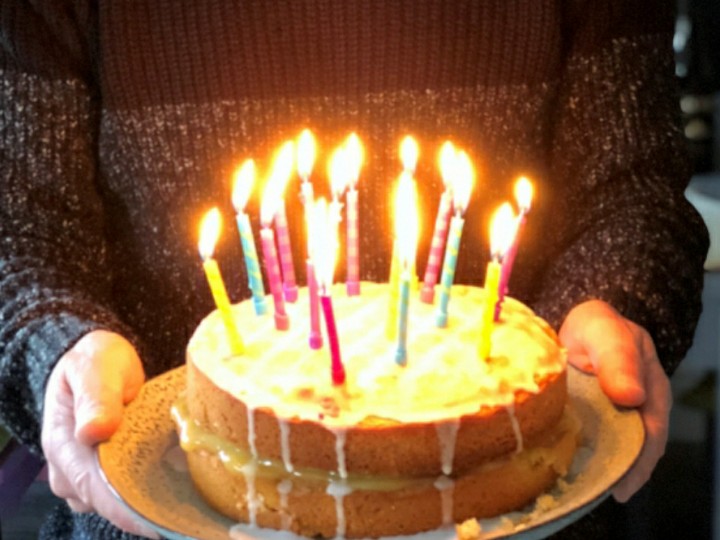
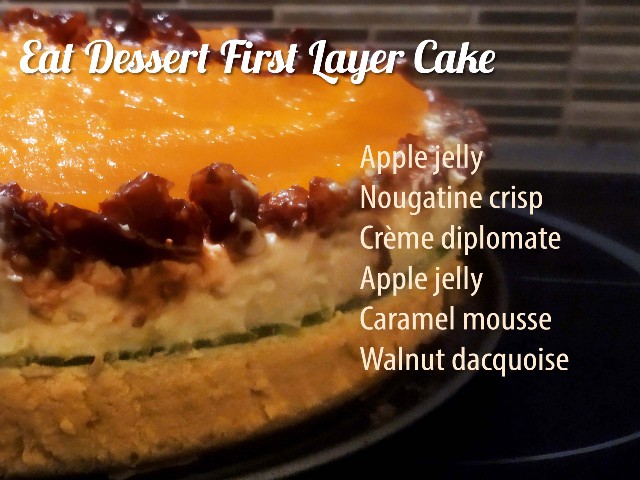
He got lucky, as one of us did indeed have his birthday… But don’t tell him that…! We did him a favor, and made a nerdy birthday cake -his Highness would eat nothing less- with many delicious layers: walnut dacquoise, caramel mousse, apple jelly, crème diplomate and nougatine crisp with walnuts. It took three days to prepare it, but he’s our one and only bear. But we also did our thing: we researched birthday cake in its American and European variations.
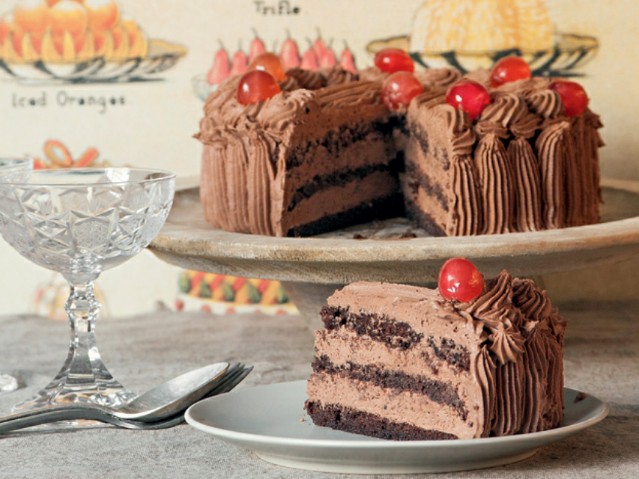
When the Americans want to bake a birthday cake, they usually make an indulging multi-layer dessert with cake layers covered with lots of buttercream frosting in different flavors and colours. The classic version consists of fluffy vanilla cake and is decorated with sprinkles, which children -and not only- love! Because of the layers it is also called layer cake and it is an American trademark, a comfort food as they call it. Its secret? The layers must be totally equal in thickness for a beautiful result, and of course the cake and buttercream fresh and yummy. Unfortunately, though, ready supermarket mixes are quite popular in the USA. It may be an easy solution, but it seems to be missing some of the warmth of a freshly baked homemade cake.
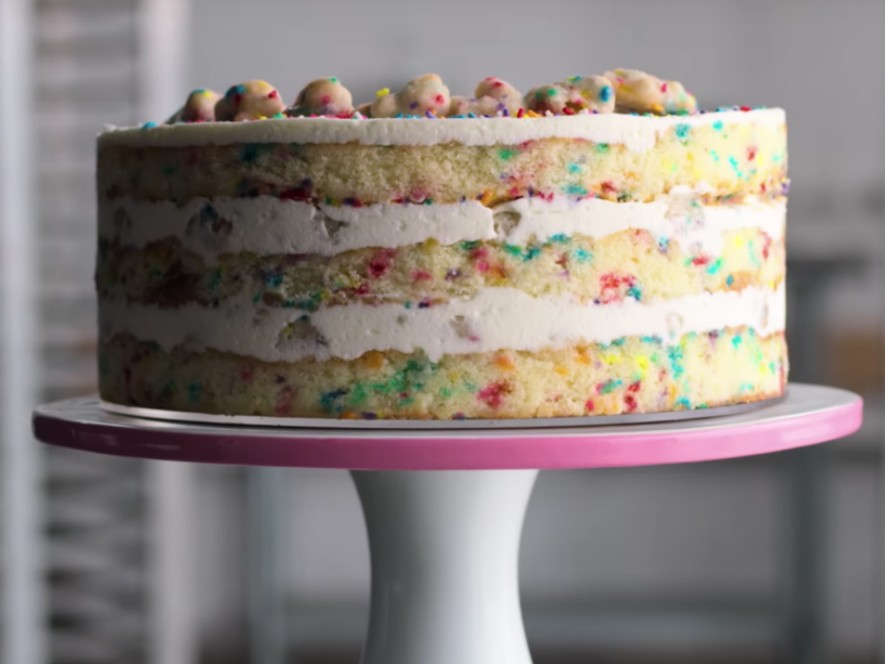
Famous pastry chef Christina Tosi -you may know her as a former judge for America’s Master Chef- has patented an innovation in layer cakes. It’s the Milk Bar’s Birthday Cake that she makes in her awarded pastry shop, Milk Bar in New York. Her signature dessert consists of layer of confetti cake -vanilla cake with colourful sprinkles inside- but has a twist: it is frosted only in between layers, not on the outside. The reason why is because she thinks that obsessing over a perfect coating is a waste of time, which can be used in more substantial things. What counts is what is inside the cake.
“So we don’t frost the sides of cake. That’s my diatribe on cake”
Christina Tosi, from the TV series Chef’s Table: Pastry (source)
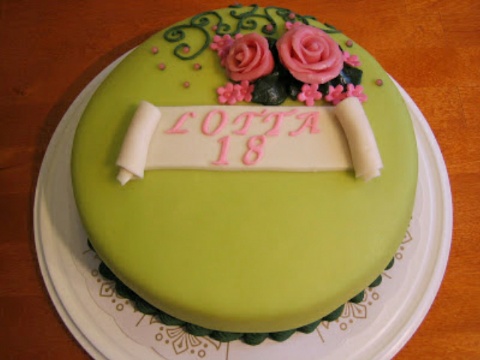
Another kind of American birthday cakes that is universally loved are fondant cakes. They are made of layers of cake and buttercream as well, but covered in fondant and decorated with realistic designs and figures. Fondant is made of sugar and is pliable like playdough; it can be rolled with a rolling pin to cover a cake or transformed into intricate 3d designs. The fondant coating gives a perfectly smooth look, that can gain different textures thanks to the special tools available on the market. This is the difference between fondant cakes and those frosted with buttercream, which have a more rustic aesthetic. Fondant cakes have lately become quite popular in Greece too.
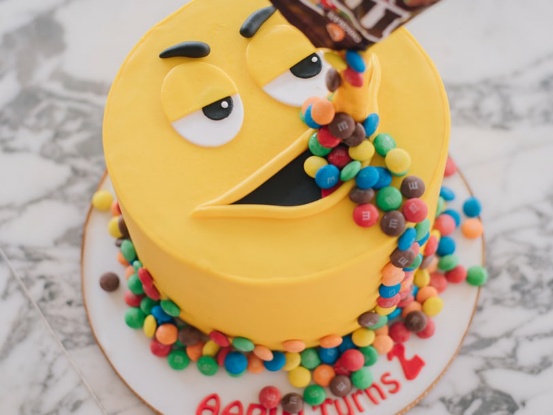
We are sure that everyone would wish for such an extravagant cake for his birthday, with bright colours, complex designs and figures like real. Some of us would dream of making it too. But we haven’t ventured that yet, because we fear that our imagination will be far from the actual result we would manage and we’d rather avoid all the tears and anger that would come with it…
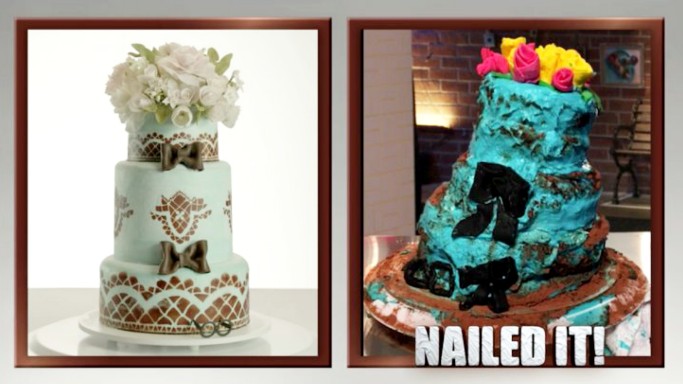
There is an American show that deals exactly with this matter: the distance between what an amateur baker actually makes from what he believes he will make. The Nailed it! show is a competition where amateur bakers try to replicate intricate desserts to win a prize. The idea was obviously based on something that -let’s be honest- has happened to all of us: trying to make complex recipes we found on the internet and the tragic results of this daring venture.
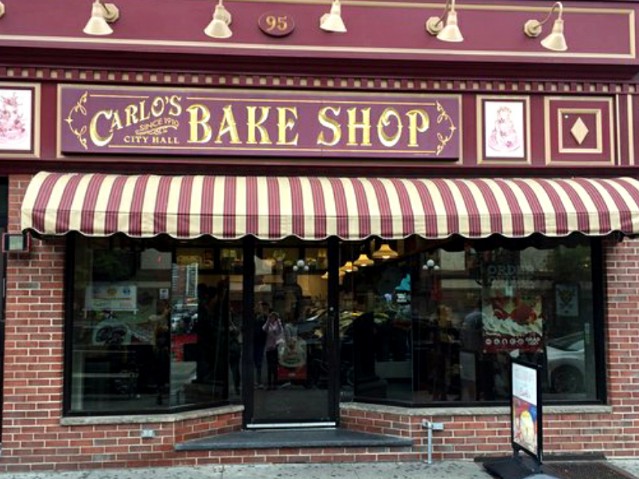
On the other hand, there are professionals that make our eyes open wide with their amazing creations. Do you know Cake Boss? He is Buddy Valastro, an Italian American baker that used to share with his audience the adventures of his family pastry shop Carlo’s Bake Shop in Hoboken, New Jersey. Buddy Valastro and his associates have taken cakes to another level: they are huge, detailed and so realistic that look actually real!
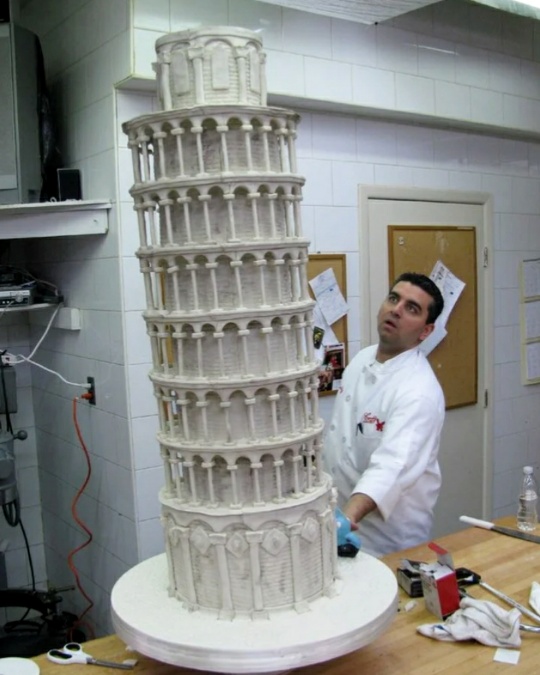
We can’t imagine how they are not sorry to slice them and eat them, and we wouldn’t even dare to think how much they cost… The bakery has evolved into a landmark and has brought tourism to the area. We may visit it one day too!
Even though American cakes are quite common, in Europe birthday cakes are different, with less sponge and more creams. They are lighter, less adorned, but as impressive, each one in its own way.
Greek birthday cake
In our country, what we craved for as kids was a classic birthday cake, with a sponge moistened with syrup, lots of cream, colourful glazed decorations and plastic figourines. Growing up, we wight have lost the figurines, but our birthday cakes kept the classic flavors: serano (chocolate layer cake), sokolatina (chocolate mousse cake), nougatina (almond cream cake), mocha (coffee cream cake), and more contemporary ones, cookies, caramel, ice cream cakes and much more.
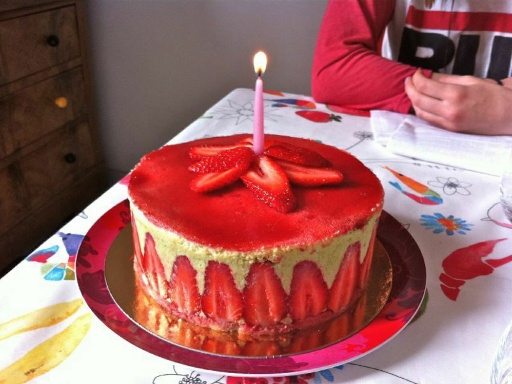
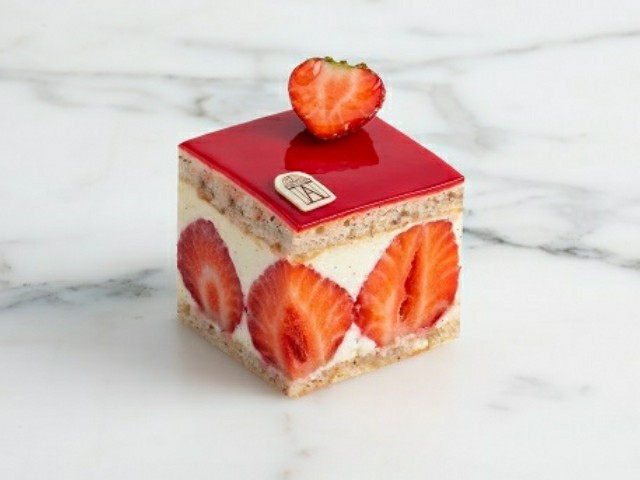
French festive Fraisier
On birthdays and celebrations in France, Fraisier, a dessert with strawberries (fraise means strawberry in French) makes its appearance. It consists of two sponges containing a delicious layer of crème mousseline (or the lighter crème diplomate) and strawberries. For the sponge the classic choise is génoise (Italian sponge with no leavening that gains its volume from the eggs’ whipping) or in more modern versions dacquoise (a base of meringue with ground nuts, see our recipe below). If we substitute berries for strawberries we will have made the equally mouthwatering Framboisier.
German Black Forest Cake
Or Schwarzwälder Kirschtorte. This globally adored cake owes its name to the cherry liqueur called Schwarzwälder Kirsch (Schwarzwälder means black forests in German) that is produced in the Black Forest area of southwest Germany. Black Forest Cake is made of layers of chocolate sponge, whipped cream, cherries and of course the local liqueur that moistens the sponges and flavors the whipped cream. It is decorated with whipped cream and chocolate shavings.
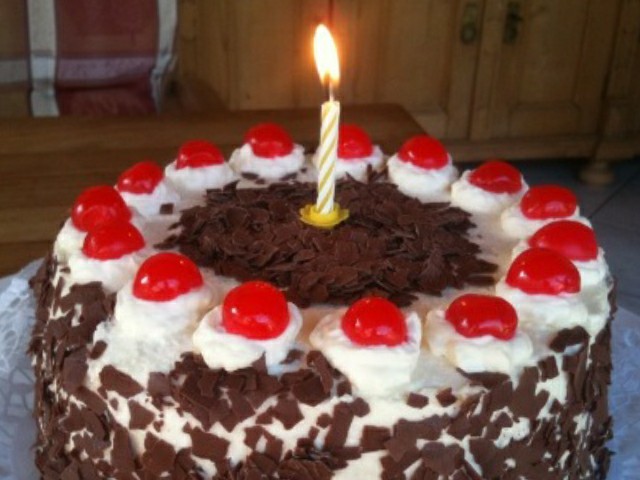
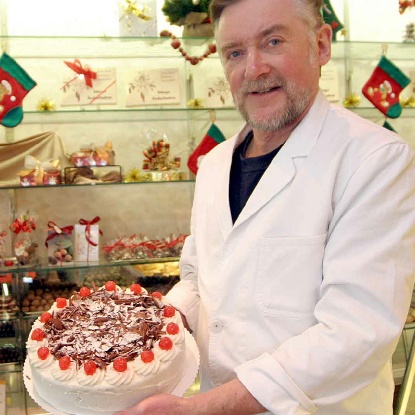
Βlack Forest cake in the hands of Claus Schaefer, who claims to have inherited the original recipe from the cake’s creator Josef Keller (source)
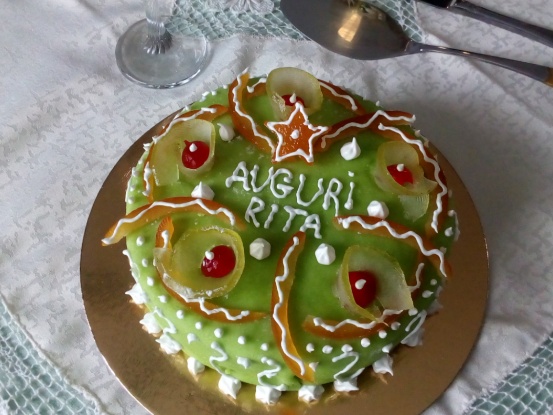
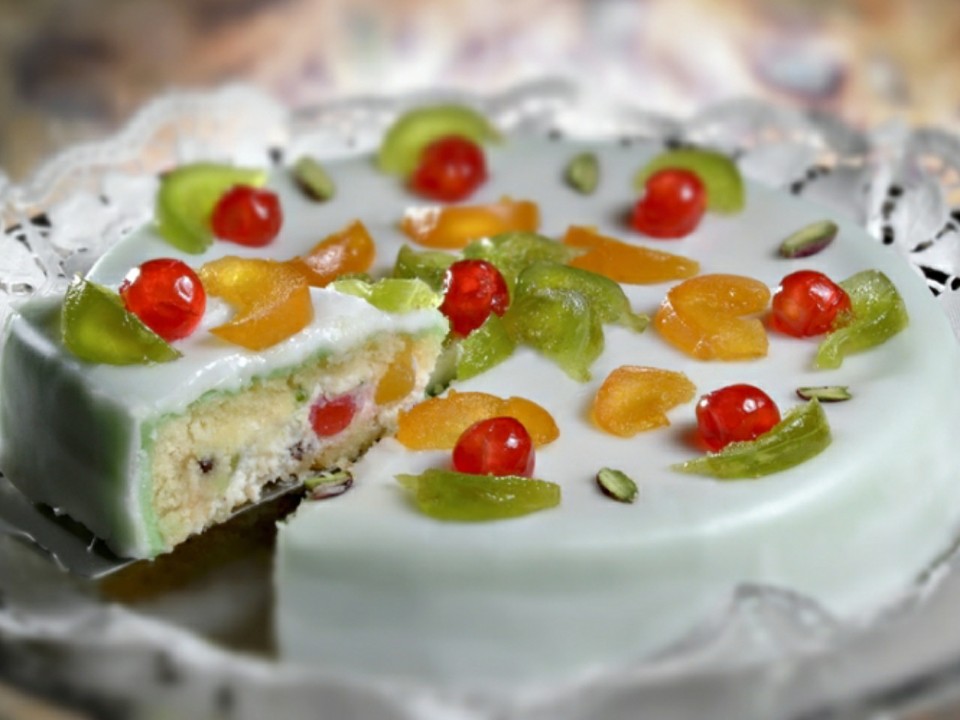
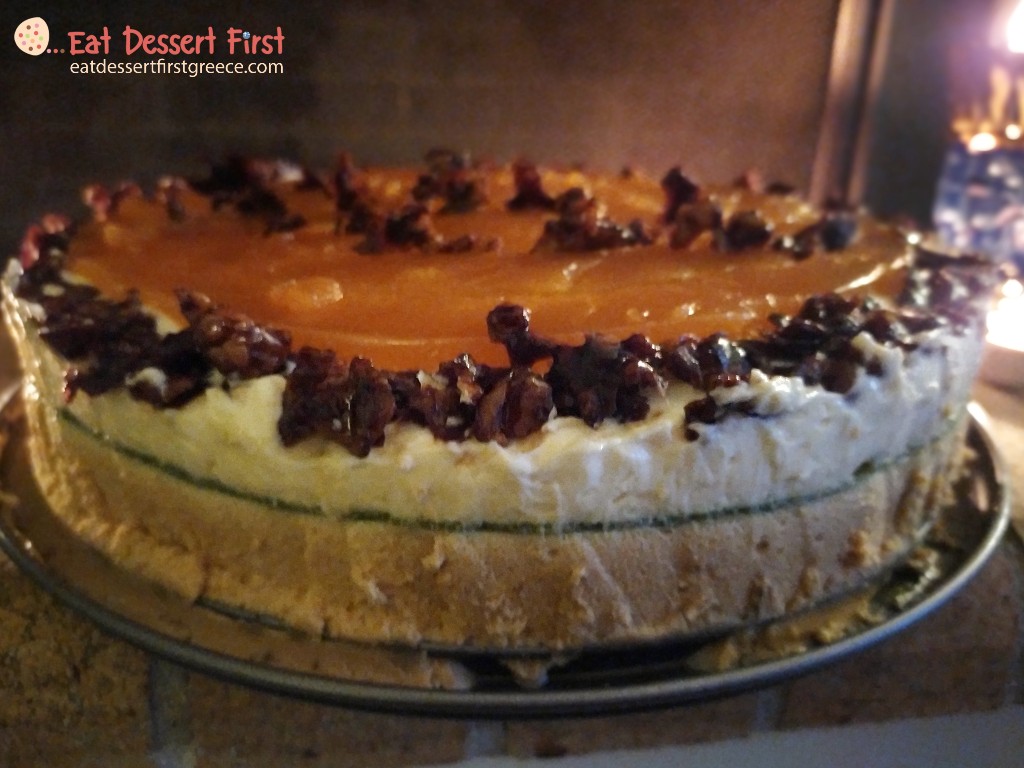
Cassata Siciliana from Sicily
Cassata is a Sicilian cake with Arabic roots. It is prepared with sponge moistened in juice or liqueur, that contains ricotta cream (same as in cannoli) and candied fruit. It is covered with marzipan and decorated with green glaze and fruit. Ricotta cream can also be substituted for ice cream! There is even an ice cream flavor named Cassata, with candied fruit and nuts.
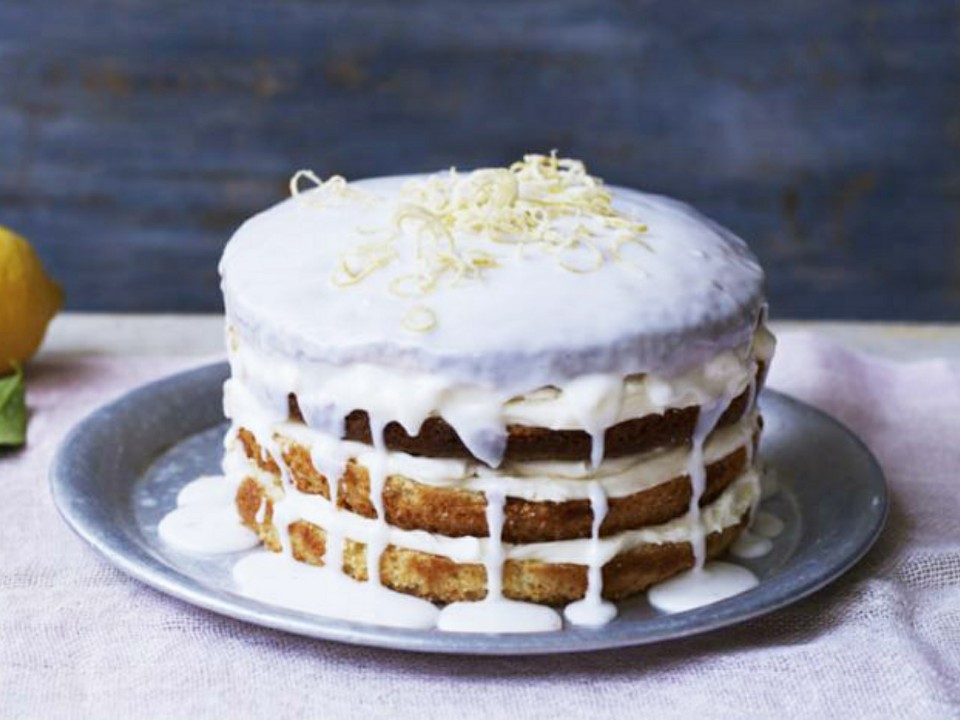
British Lemon Drizzle Cake
One of the festive desserts the British prefer is Lemon Drizzle Cake. It is a simple, moist lemon cake that is glazed with a sugar-lemon glaze while still warm, to gain a crunchy crust. Its texture is denser and more buttery than the classic British Victorian Spongecake, more like a Pound Cake (a cake with equal proportions of butter, sugar, eggs and flour). In a 2018 survey, Lemon Drizzle Cake even earned first place, leaving Victorian Spongecake behind, at fifth place!
Swedish Princess Cake
Swedish Princesstårta (Princess cake) is a traditional dessert with layers of airy sponge, jam -usually raspberry jam- pastry cream and lots of whipped cream. It is shaped like a dome, covered in green marzipan and decorated with pink roses. This is the reason why in the beginning it was called grön tårta (green cake in Swedish). The name Princesstårta is due to the fact that its creator used to be the teacher of the daughters of Prince Carl of Sweden and Norway.

In our own birthday cake we decided to use French techniques for a light outcome, along with flavors and aromas of something Greek and homely, apple pie. We gave the cake the form of an entremet: French dessert with multiple layers of light mousses, with individual elements of different flavors and textures.
A little secret!
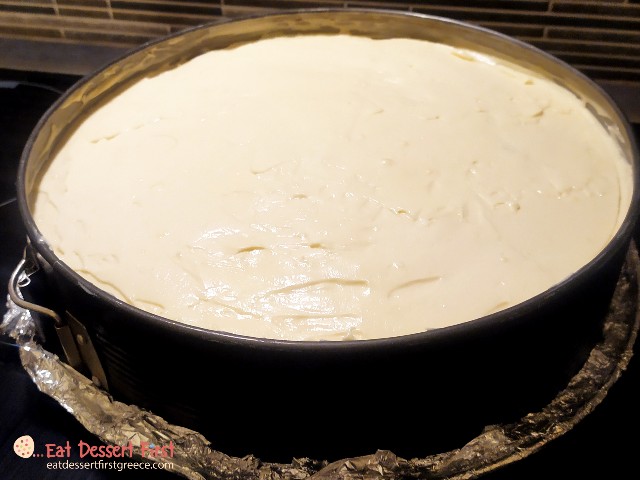
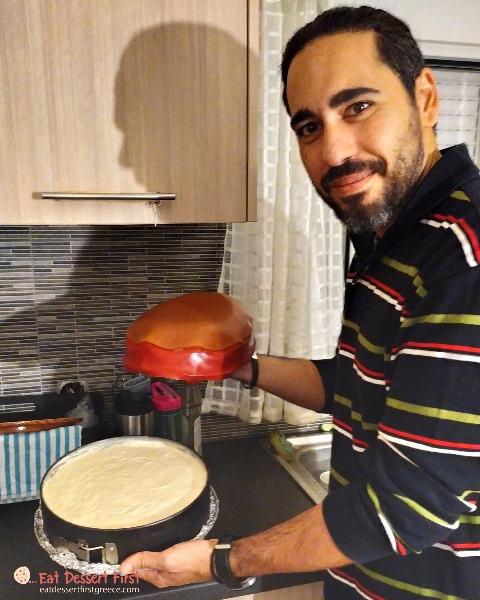
Very important: For making a layer cake we must start a few days early or at least in the morning, as each layer has to cool and set before adding the next one. Professionals have special equipment (blast chillers/shock freezers) that freeze the layers right away; the rest of us have no choice but to be patient and wait!
Eat Dessert First Layer Cake
Our recipe
Nougatine crisp
Recipe adapted from our favourite professional book The Art of French Pastry by Jacquy Pfeiffer.
Ingredients
| Gelatine (powder) | 1/4 tsp |
| Cocoa | 1 tsp (5 gr) |
| Milk | 1 tbs (15 gr) |
| Butter | 30 gr |
| Glucose syrup | 15 gr |
| Sugar | 50 gr |
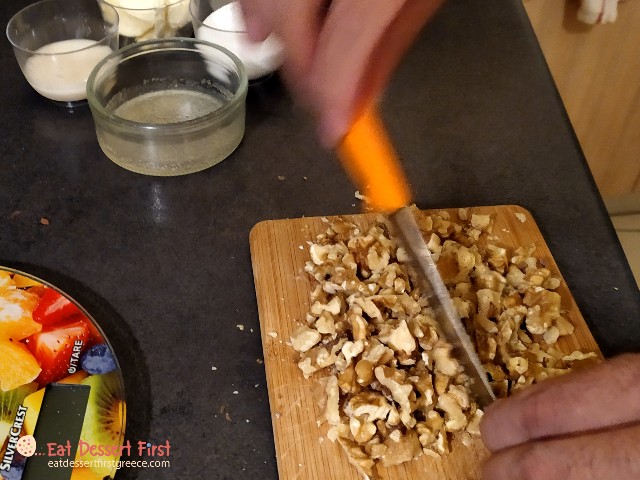
| Walnuts, chopped | 50 gr |
Method
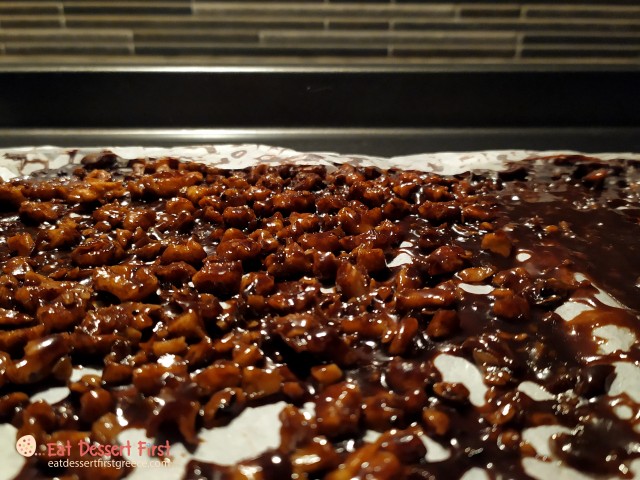
Before starting, place a pan lined with parchment paper in the freezer. Place the gelatine in a small bowl with some water to moisten. In a saucepan, place the milk, butter and glucose syrup and heat to 105°C (2 minutes approximately). Take the saucepan off the heat, wait for 2 minutes and mix in the cocoa, gelatine and chopped walnuts with a spatula.
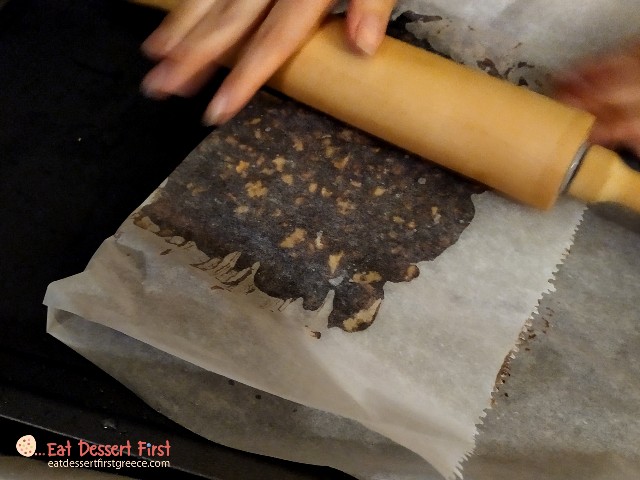
Quickly pour the mixture into the pan (lined with parchment paper) you had placed in the refrigerator and spread it in a thin layer. Cover with parchment paper and roll with a rolling pin into an even thinner layer. Place the pan in the freezer for 30 minutes.
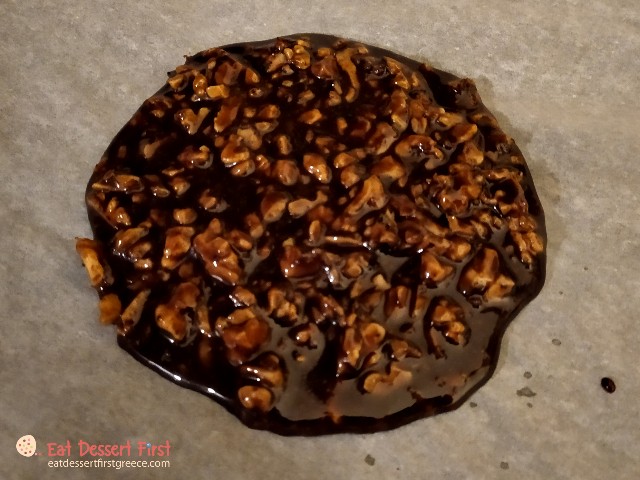
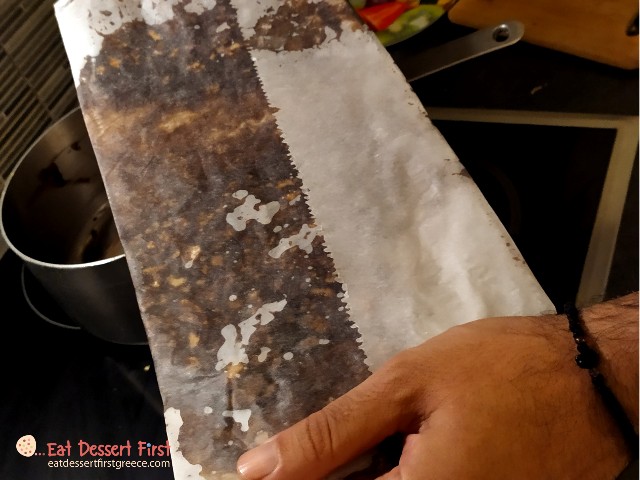
Take off the top parchment paper and bake in a preheated oven at 160°C for 12-15 minutes, until it gets crispy. When it cools down, break it into pieces. It can be stored for many days at room temperature in a closed box and used it anything you want!
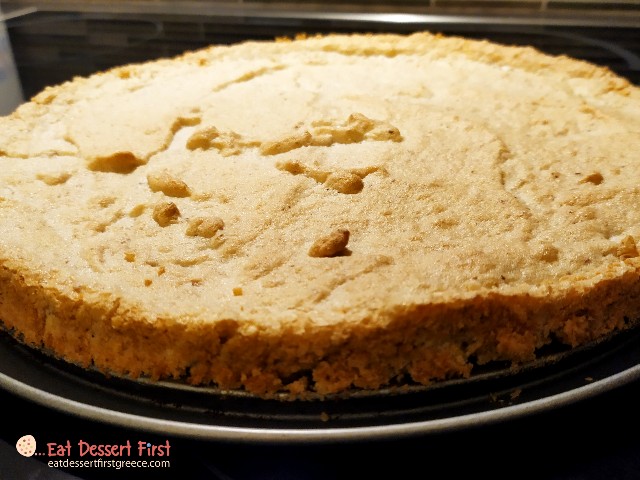
Walnut dacquoise
Recipe adapted from our favourite professional book The Art of French Pastry by Jacquy Pfeiffer.
Ingredients
| Walnuts | 100 gr |
| Caster sugar | 100 gr |
| All purpose flour | 10 gr |
| Egg whites | 4 |
| Sugar | 25 gr |
| Cream of tartar (optional) | a pinch |
| Salt | a pinch |
Method
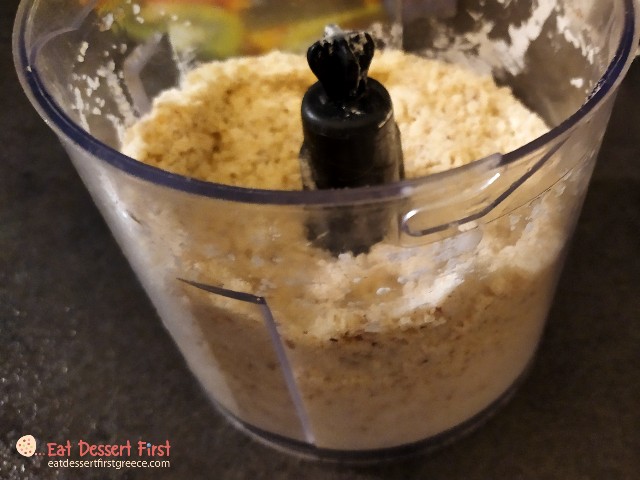
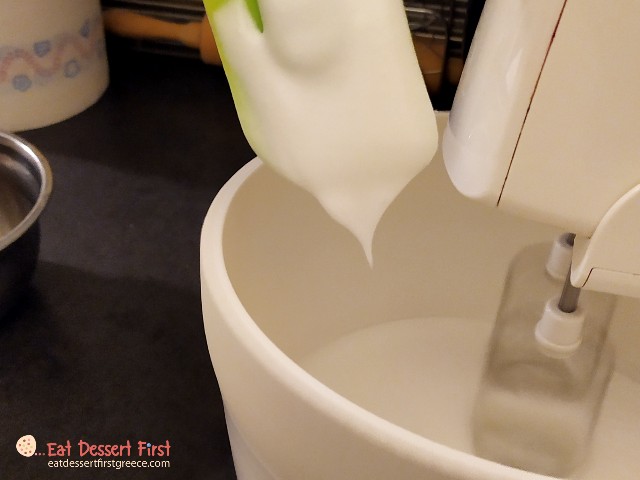
Blend the walnuts into flour in a food processor (or blender) together with the caster sugar. In the end add the flour and blend for 1 minute. Put the egg whites, cream of tartar and salt in the mixer bowl. Cream of tartar is added to stabilise the volume of the meringue, but it is not necessary. Whisk for 10 seconds at medium speed. Add the sugar and whisk at high speed until it transforms into a firm, shiny meringue (4-5 minutes). If you feel courageous you can make the test of turning the bowl upside down: if it doesn’t fall on your head, then it’s ready!
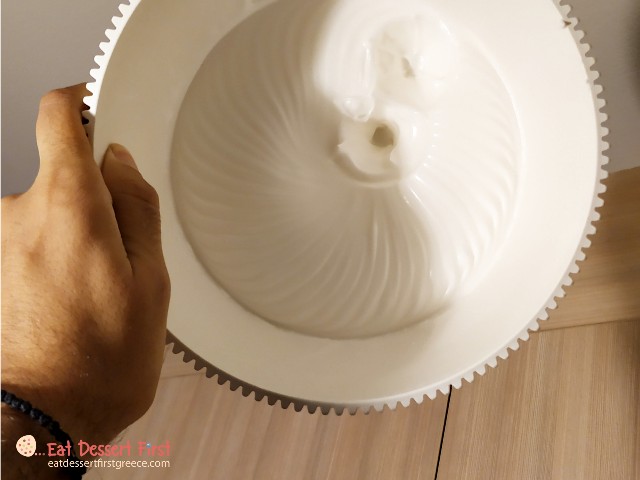
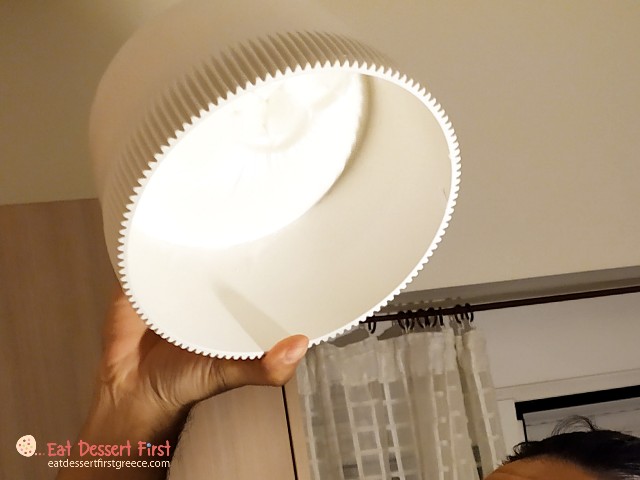
Add the blended solids and gently fold with the spatula, so that the meringue doesn’t loose its volume. Spread the mixture gently into a round springform pan or metal ring. Better use the springform pan, so that the final cake comes out easily, as on top of the dacquoise you will place all the other layers. Bake at 180°C for 5 minutes and at 150°C for 30 minutes. Let it cool at room temperature and store in the refrigerator for 1-2 days until finishing all the layers

Caramel mousse
Recipe adapted from our second favourite professional book On baking, A Textbook of Baking and Pastry Fundamentals.
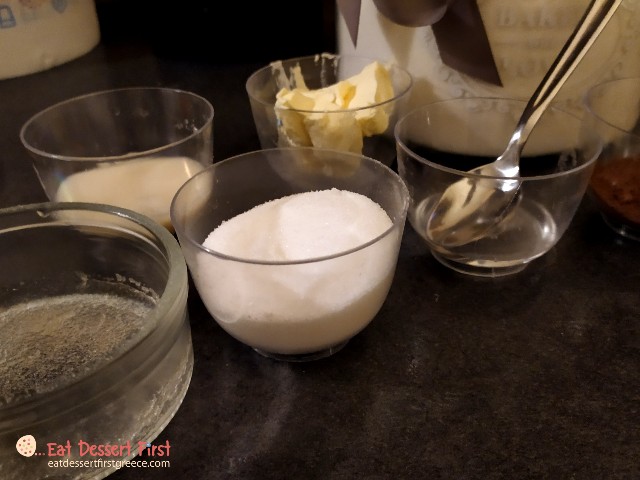
Ingredients
| Glucose syrup | 55 γρ. |
| Sugar | 90 γρ. |
| Water | 40 ml |
| Butter | 25 γρ. |
| Heavy cream | 90 ml |
| Egg yolks | 4 |
| Gelatine (powder) | 8 γρ. |
| Vanilla extract | 3-4 σταγόνες |
| Heavy cream (whipped, room temp.) | 270 ml |
Method
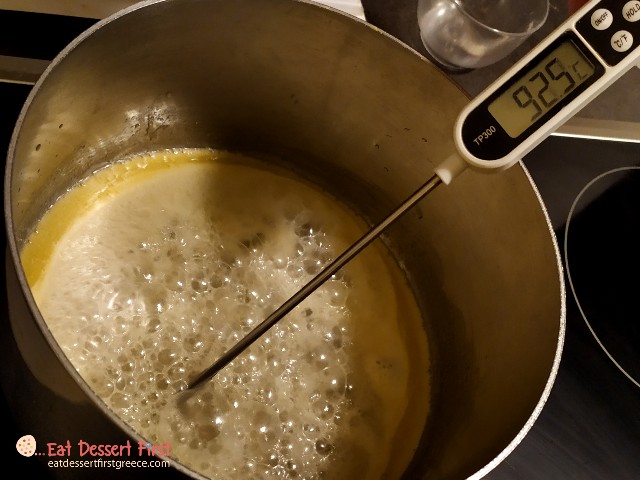
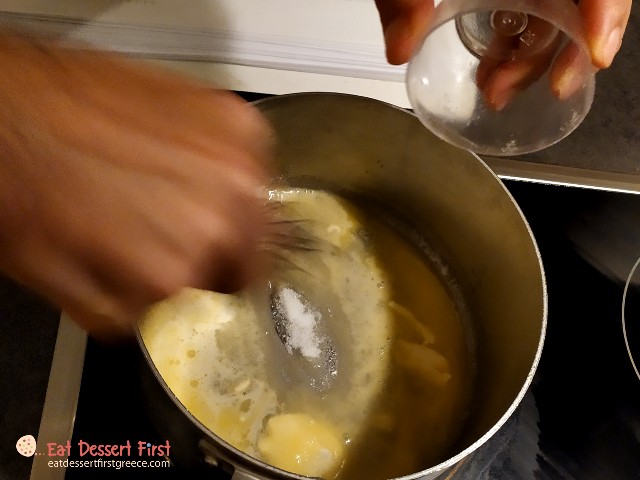
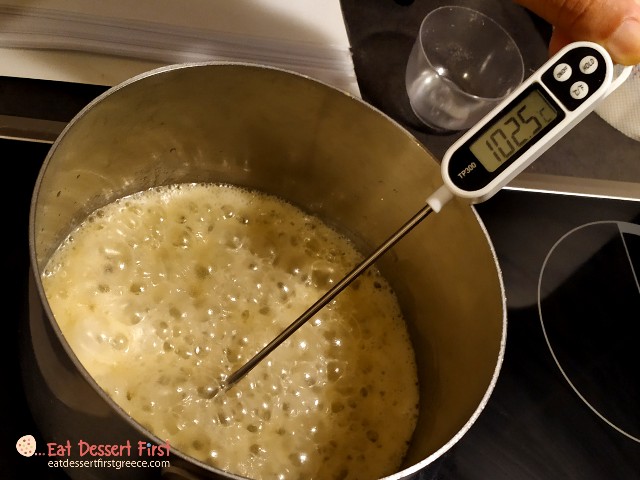
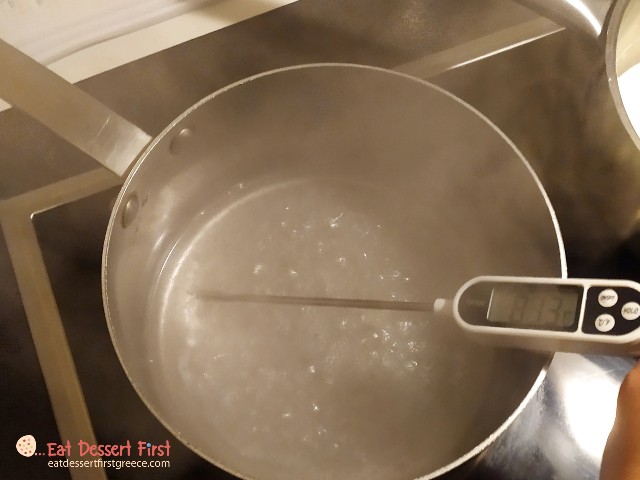
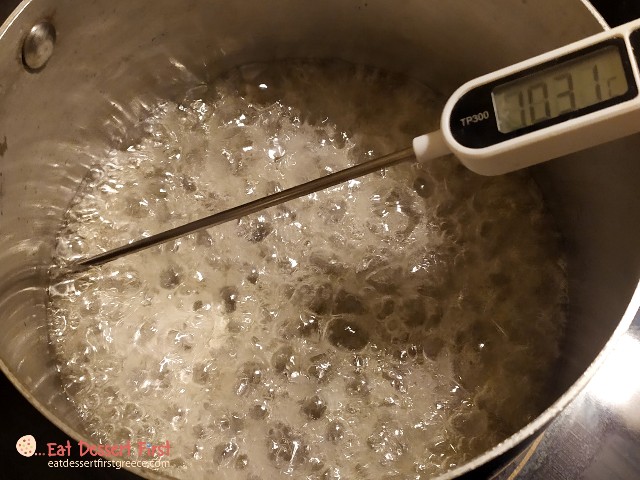
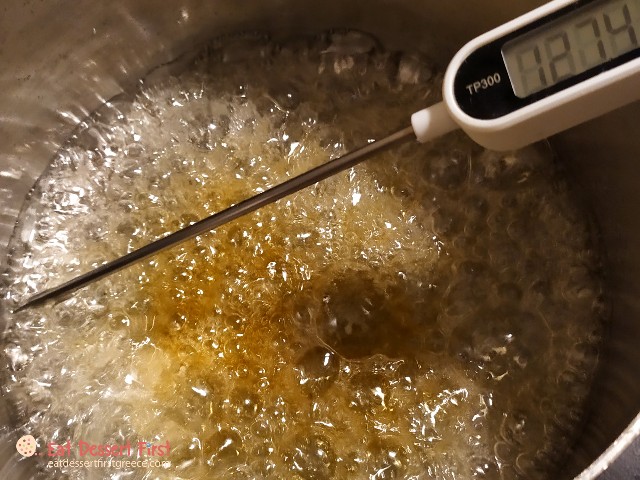
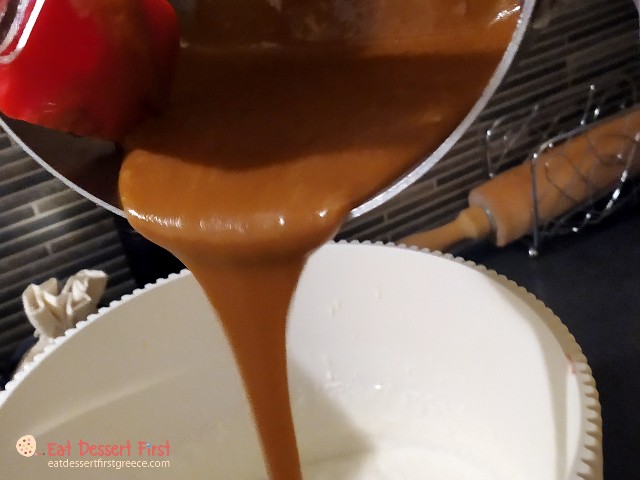
Heat the heavy cream and keep it aside. Place the glucose syrup, 2/3 of the sugar (60 gr) and the water in a saucepan. Bring to a boil and clean the sides of the saucepan if they have sugar on with a wet brush (if the sugar falls into the caramel it may cause it to crystallize). Heat without stiring until it reaches 175°C (by eye until it becomes a dark caramel, but be careful not to burn it).
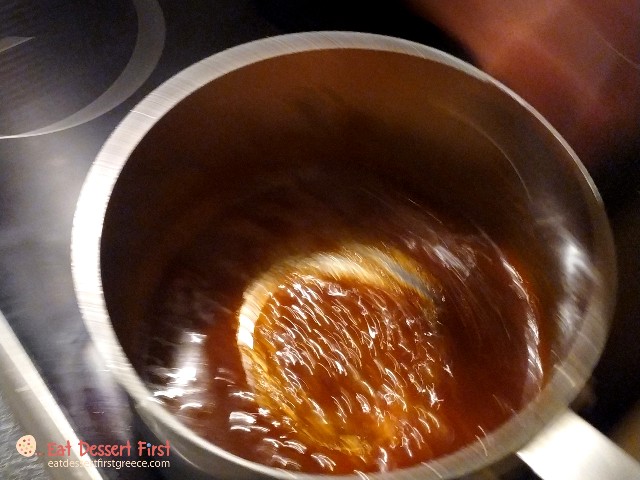
Add the butter and warm heavy cream carefully as the caramel will rise and it is very hot. Boil for 2 minutes, take the saucepan off the heat and let the caramel cool to 30°C. Now you may add vanilla or liqueur.
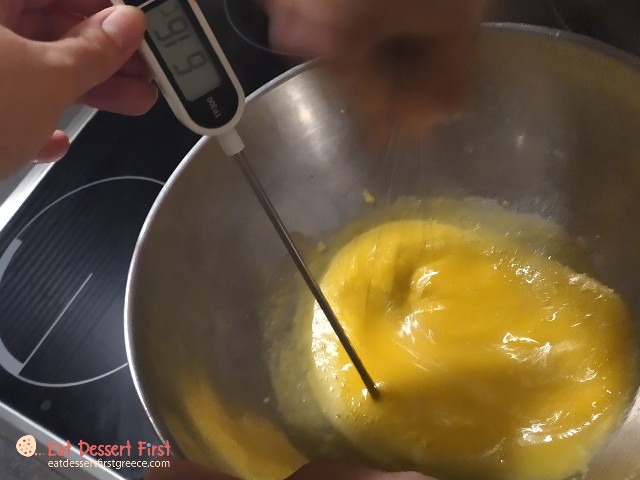
While waiting for the caramel to cool, put the gelatine in a small bowl with some water. Place the egg yolks in a metal bowl (not a plastic one as it will be used in a bain marie) to make a pâte à bombe (like a meringue but with yolks, a base for mousses). Add the rest of the sugar and beat with a hand whisk. Pour some water into a saucepan (one centimeter high) and when it comes to a boil place the bowl with the yolks on top. Whisk constantly until it reaches 75°C (by eye until it becomes a foam, for 4-5 minutes at high heat). Transfer to a mixer bowl and add the softened gelatine. Beat until its temperature cools to 30°C.

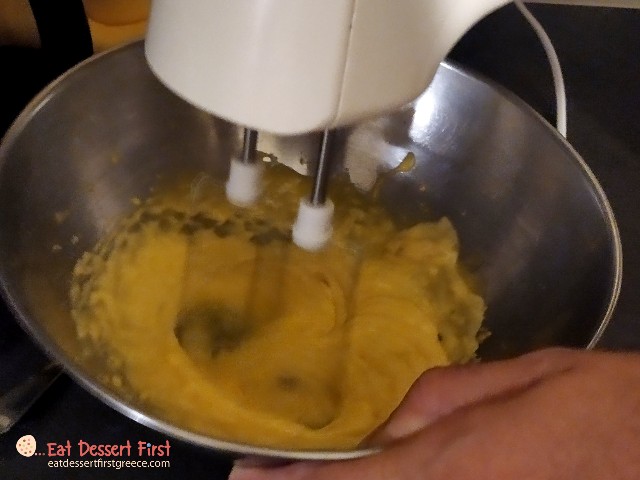
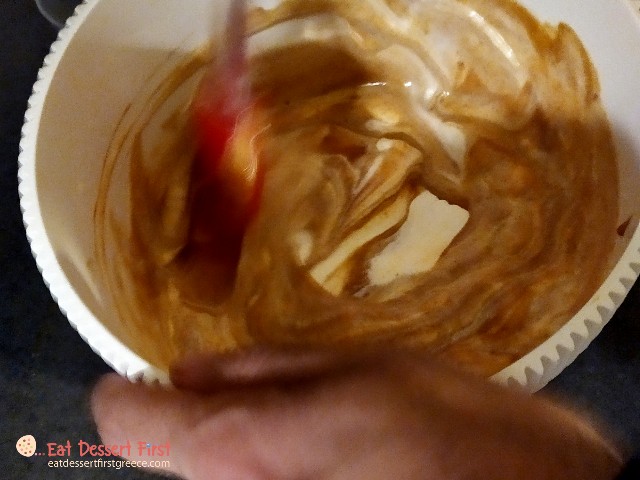
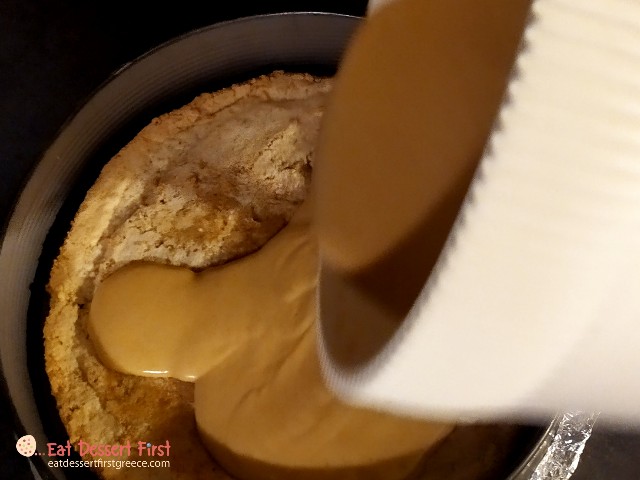
Pour the caramel into the pâte à bombe and fold with a spatula. If it is too hard you can use a hand whisk. When homogenised, add the whipped cream (at room temperature) and fold with the spatula. Pour the mixture immediately on top of the dacquoise and place in the refrigerator for several hours, until it sets.

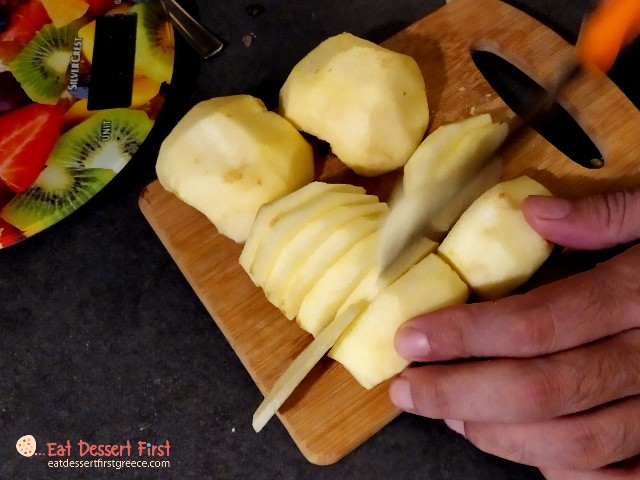
Apple jelly
Ingredients
| Apples | 2 |
| Water | 250 ml |
| Honey | 1 tbs |
| Gelatine (powder) | 10 gr |
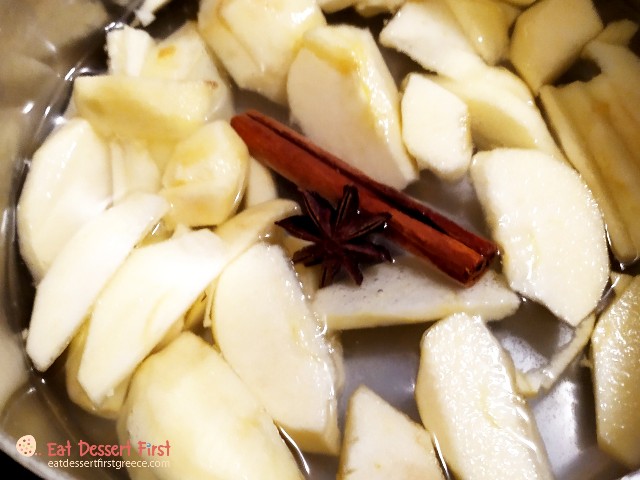
| Cinnamon | 1 stick |
| Star anise | 1 star |
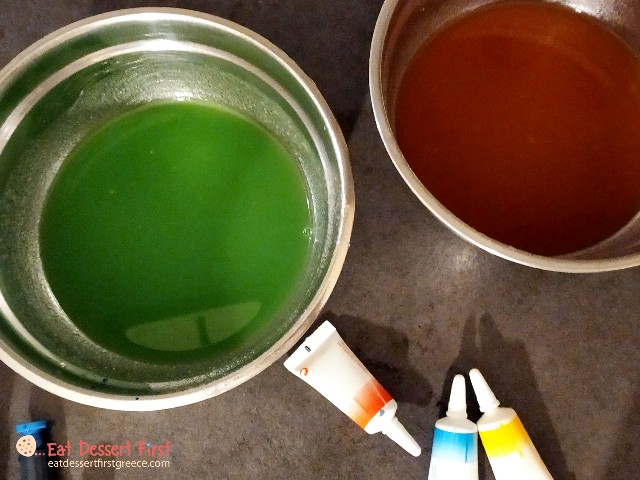
| Food colouring | blue, yellow, red |
Method
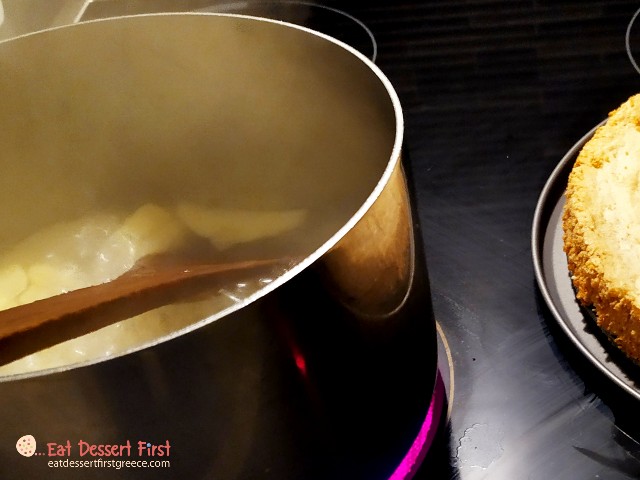
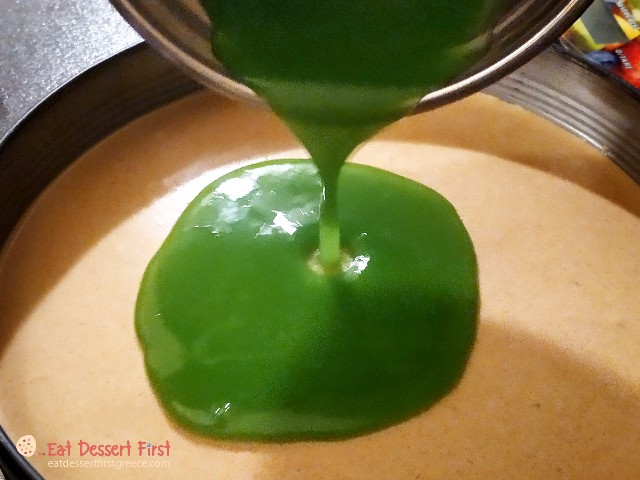
Place the gelatine in a small bowl with some water to soften. Peel and chop the apples. Place them in a saucepan with the water, cinnamon and star anise to boil for 10 minutes or until soft. Remove the cinnamon and star anise and blend together with the water with a hand blender (or in the food processor or even with a fork). Add the gelatine and stir well to dissolve.
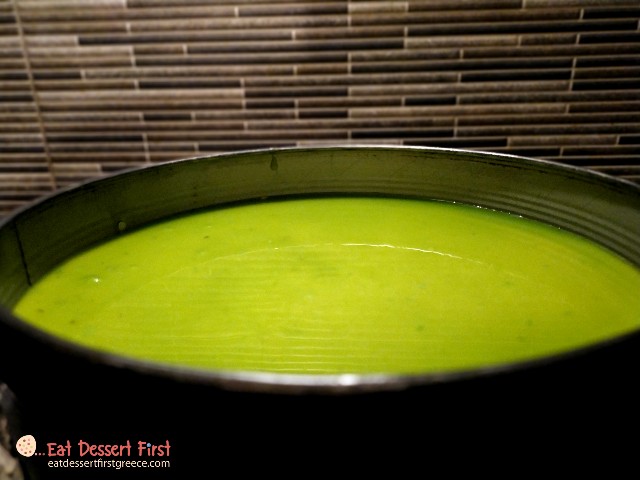
Divide into two bowls, add into the one some drops of red colouring and into the other some blue and yellow. Carefully pour the green jelly into the springform pan, where the caramel mousse has set. Pour the orange jelly in a round silicone mould, as it will be added at the end (must be silicone so that it doesn’t break into pieces when removing). Otherwise, make half the amount of jelly (the green one) now and the rest (the orange jelly) when all the cake’s layers are finished, so that is goes on top last. Place in the refrigerator to set for several hours.
Crème diplomate
Ingredients
| Milk | 500 ml |
| Yolks | 4 (or 2 whole eggs) |
| Sugar | 120 gr |
| Corn flour (sifted) | 30 gr |
| Cake flour (sifted) | 30 ge |
| Vanilla extract | 5-6 drops |
| Heavy cream (whipped) | 300 ml |
| Gelatine (powder) | 10 gr |
Method
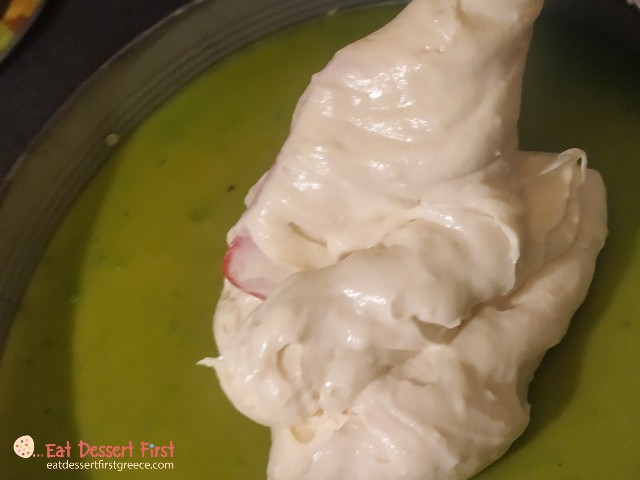
Place the gelatine with some water in a small bowl to soften. Prepare a pastry cream as described here. While it is still warm add the gelatine and stir well to dissolve. Place the pastry cream in the freezer for half an hour at least, until it reaches room temperature. Then fold the whipped cream into the pastry cream and pour the mixture into the springform pan, on top of the green jelly layer. Place in the refrigerator to set for many hours.
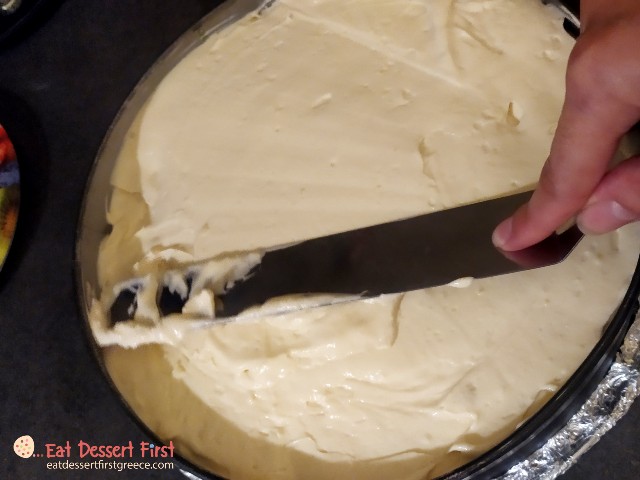
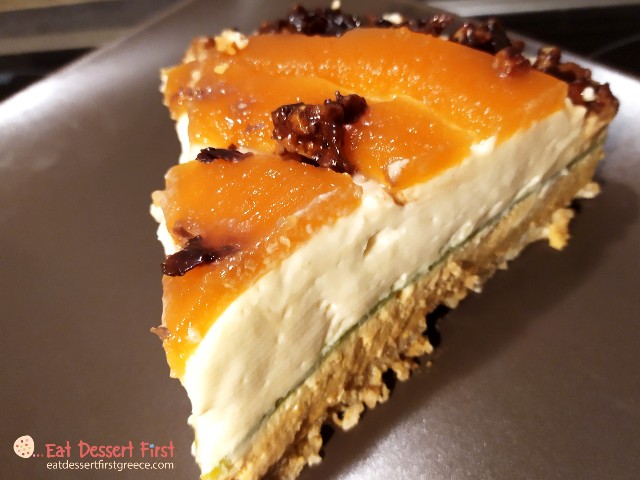
Decoration
For the final -and most impressive- layer of the cake, place carefully the red jelly on top of the crème diplomate. As the jelly is fragile and normally it should have been added as a liquid on top to set inside the springform pan, if it breaks don’t get upset… Improvise and create decorations with its pieces! Finally, garnish the top of the cake with pieces of nougatine crisp. Let the sides as they are, so that one can see the layers.
Light a candle and wish happy birthday from your heart to anyone celebrating!
Be the first one to read our new articles!
Follow us by submitting your email into the box you will find if you scroll down our page, so that you receive each new article by email as soon as it is online. Don’t forget to confirm your subscription, in the email you will receive! 🤗 For wordpress bloggers like ourselves, just press the follow button. Follow us on Instagram (@eatdessertfirstgreece) and follow our new Facebook page (eatdessertfirstgreece) to see our posts with our favourite desserts… and much more!

What a GREAT blog!!!!!! SO fun and informative!!!!! Thank you!!!!!!!!! 🙂 🙂 🙂
LikeLiked by 1 person
Thank you so much!!!!! 🙂 🙂 🙂
LikeLiked by 1 person
Hi. Great Post. Scrumptious-llllllllllly delicious. Happy Cake Day. Happy Blogging. Goff
LikeLike
Thank you very much Goff!!! Happy blogging to you too!!!
LikeLiked by 1 person
Cheers. One CAN have ones cake and eat it. Happy Day. Goff
LikeLiked by 1 person
💖💖🙏
LikeLiked by 1 person
Reblogged this on #TheBloggerMe and commented:
Many thanks for writing & posting mouth watering desserts receipe…More power to your pen & pan !!
LikeLike
Great Post! Love it!!
LikeLike
Thank you very much!!
LikeLike
What a sweet post! Thank you for all the fabulous information!
LikeLike
Thank you so much Mrs Diane!! ❣🙏
LikeLiked by 1 person
Too pretty to eat. ALL of them. I must admit, I’m a store bought mix kind of girl:). Cake is the best.
LikeLike
Thank you so much for your kind words! 💖🙏
LikeLiked by 1 person
Had to laugh when I saw the name of the blog. That’s always been my motto —-“eat dessert first.” Fun post. Would love to be able to sample each one of the cakes shown here!
LikeLike
Thank you very much! Great moto! 😉💖
LikeLiked by 1 person