
December is here, it’s cold outside and Christmas is coming. Our Christmas lights are blinking and our mood is already quite festive! So, we want to prepare our first presents for the people we love… and what can be sweeter than a bag of handmade Christmas cookies? Our Greek Christmas sweets (melomakarona and kourabiedes) maybe but we will talk about that in another article… So, in our new sweet article we will make a handmade Christmas chef’s hat -to be fully equipped for our holiday creations- and we will bake Christmas cookies wearing it proudly! We will also talk about the benefits of children’s participating in cooking and baking at home and in school -for parents and teachers who are not afraid to get dirty.
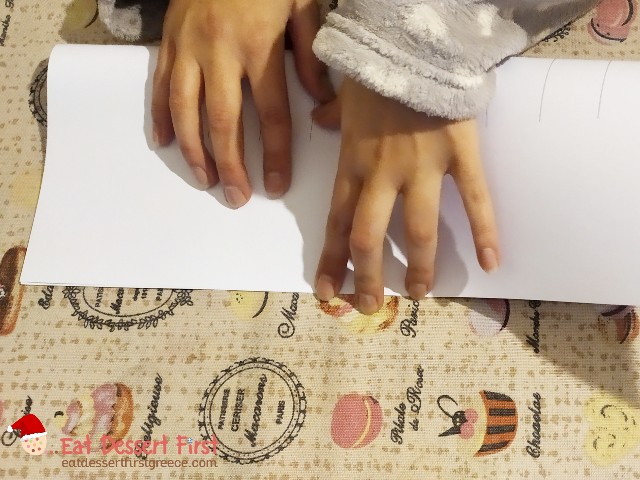
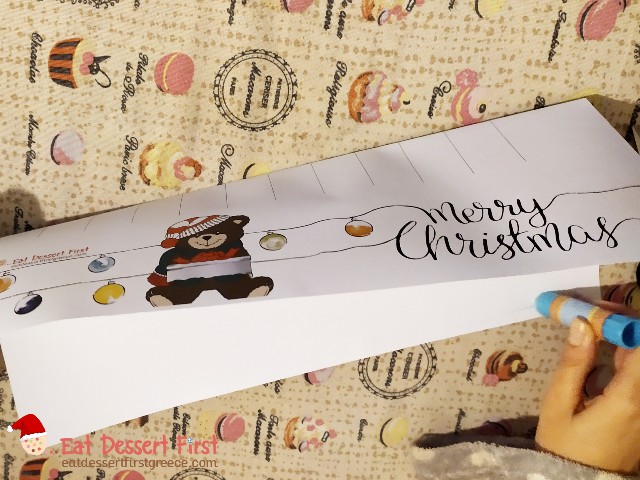
We are in a sweet mood, we have all the necessary ingredients, we will give you the recipe for the cookies, but first of all we are missing the most important… a chef’s hat! All the younger and older wannabe pastry chefs like us deserve at least one semi-tall white hat. As we also like crafting, we made a pattern as a gift for you to download and construct yourselves. It’s super easy and as soon as you acquire it, you will enter your kitchen with a different feeling, you’ll see!

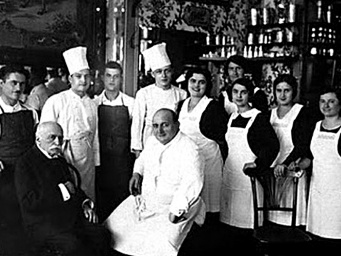
According to an article of Auguste Escoffier culinary school, a chef’s hat is very important as it shows a lot about his personality, his style and his level of expertise. The white chef’s hat comes from France. It was originally called toque blanche (white hat) from the Arabic word for the hat.

The hat’s colour is always white, because in the early 19th century the great French chef Marie-Antoine Carême believed that white offers a sense of cleanliness in the kitchen. The pleats on the chef’s hat have their reason of being: they used to symbolise the chef’s abilities -if hat had a hundred pleats that meant that the chef knew a hundred ways to boil an egg. Also, the taller the hat the higher the chef’s role in the kitchen. It is said that once Carême wore an 18-inch hat (half a meter tall) to highlight his prestige!
The use of the chef’s hat became popular in the 20th century. We learned that Auguste Escoffier, another great French chef with his own special place in history, established the hat as part of the innovation he brought to the organisation of the professional kitchen -the allocation of tasks, exemplar behaviour of the staff and impeccable uniform.
Why can’t we be spotlessly dressed in our kitchen too? Go to the nearest print shop, print our file (use A3 paper size for a small size or A2 for a larger one and ask for a thicker paper, ours is A3 size), get a pair of scissors and a stick glue and make it happen!


Holidays are a perfect chance for our little friends to take action in the kitchen too. Children can earn a lot by participating in cooking and baking. At the website of the Psychology Department at Carnegie Mellon University we found that cooking activities offer a lot to the sentimental, social and lingual development of little children (3-6 year olds).
First of all, it reinforces their independence and self esteem, as they feel personal fulfilment for the food they prepared and ate. Kids get the chance to practically comprehend the value of healthy eating habits. This is why it is important during the preparation of our cookies to discuss the need for eating sweets in moderation. Cooking also helps develop a sense of pride for their family background, eating habits and family roles. We all surely have a traditional recipe for cookies or other Christmas sweets from our mother, our grandma or our aunt, let’s honour it too!

While cooking, children interact with others and learn to cooperate by following the recipe’s directions, organising the cleanup, respecting and behaving well in the kitchen and at the table, resolving conflicts with adults (parents at home, teachers in school) and peers (siblings at home, classmates in school). They practice communicating, at first orally and later in writing, learn new vocabulary about food and cooking, as well as what is the role of numbers and symbols in a recipe. By seeing and reading a recipe, kids get in touch with this particular type of texts and their function. Cooking and eating is also a great time for kids to tell stories and narrate their experiences, as well as listen to the stories of others, parents, relatives, teachers or friends. As for the preparation of our cookies, cutting shapes takes a lot of time -so let’s use it to talk, not only with children but with whoever is in our company!

Also, when preparing a recipe, kids observe, question and experiment… With the adults’ guidance they can learn the various categories of food and ingredients and their qualities, what food offers to humans, why we should eat healthy, the nutrients in the ingredients they are using, the various jobs related to food and much more. Of course children should have space to express themselves and create, by giving shapes and decorating the food they are preparing , and also by using ingredients in an artistic way, such as crafting with dry pasta and legumes. Give the kids the chance to decorate their cookies and they will surely come out amazing -total works of children’s art!

Finally, through cooking and baking children develop their mathematical skills. As we read, children can learn about quantity and weight and try to make estimations, predictions and comparisons. The can count, read numbers and get in touch with shapes, while they can also count time (e.g. baking times). Also, they enrich their mathematical vocabulary with phrases related to counting (how much, enough, almost, so much…as, heavy, light, full, half, a quarter etc.), comparison (bigger than, smaller than, less, more, last, first, second etc.), arithmetical operations (add, substract, a little more, how much is left, how many more to make etc.) shapes (round, square, star, edges, sides etc.) and positions (up, down, next to, inside, stretch, roll etc.). Ask the kids to organise the baked cookies in stacks of five or ten to pack for gifts, and whatever else you can come up with…
All those just by baking a sheet of delicious cookies! And the most important is that cooking and baking at home provides quality time not only for kids, but for adults with each other too. So, get your spouses, parents, children, relatives, friends, put some Christmas songs playing and let’s go for sweet creations… And don’t forget your hat!
Our recipe
Christmas cookies
Ingredients for the cookies
| Cake flour (sifted) | 180 gr |
| All-purpose flour (sifted) | 180 gr |
| Baking powder | 1/2 tsp |
| Butter (room temp.) | 270 gr |
| Egg | 1 |
| Sugar | 150 gr |
| Confectioners sugar | 90 gr |
| Salt | 1/2 tsp |
| Vanilla | |
| Lemon zest |

How to make the cookies
Sift the flour with the baking powder. Use half cake flour – half all-purpose flour, because using only cake flour would make the dough too crumbly, while only all-purpose flour would make the cookies harder. Cream butter and sugars at medium speed for approximately five minutes. Add the salt, egg, vanilla and lemon zest and beat to incorporate.


Remove the bowl from the mixer and add the flour. Mix gently with a wooden spoon at first and then with your hands, but not too much so the gluten doesn’t get activated (this would result in hard cookies). The dough will be quite sticky but don’t worry it will get firm in the refrigerator. It may just get all over the little hands, the bench, the walls and who knows what else… We warned you! Wrap the dough in clingfilm and place it in the refrigerator for at least two hours.


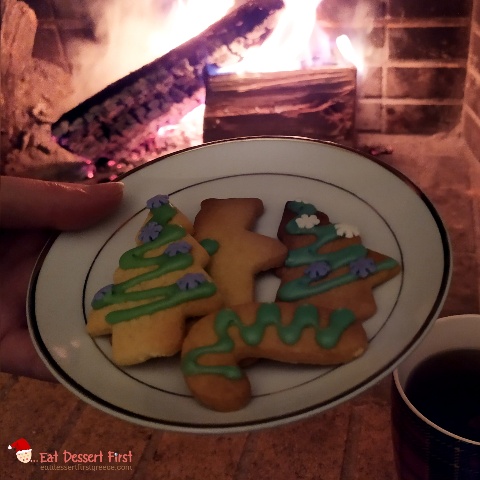
When the two hours have passed, take a piece of dough, dust the bench with lots of flour (we also added a silicone mat), dust the dough and stretch with a rolling pin. This is why the dough was initially sticky, to have room for adding flourishing without making cookies less buttery. Cut shapes with your Christmas cutters and place them on baking pans, lined with parchment paper or a silicone mat. With the recipe’s quantities we made cookies to fill three pans, quite many! Bake in a preheated oven at 160°C for 15-20 minutes, depending on the oven. Let them cool well before decorating with icing.


Ingredients for the icing
| Confectioners sugar | 1 cup |
| Water | 2 tbsp |
| Food colouring | a few drops |
How to make the icing
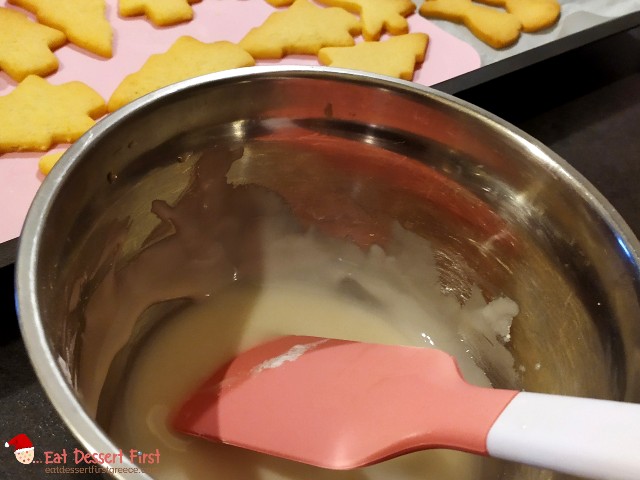
Mix confectioners sugar and water with a spatula and add some drops of food colouring, depending on how intense you want it to be. If you want to have many colours, divide the icing into separate bowls and add colourings (you will need to double the ingredients). The icing’s texture has to be thick but still liquid, so better make some trials, adding more sugar to make it thicker or more water to make it runnier.

Fill a piping bag (we used a bottle), topped with a nozzle with a small opening. Decorate the cookies and let them dry for 24 hours. Store them in a closed box or freeze them, to keep them for the holidays.


One -or better three- pans of sweet cookies from the Eat Dessert First team for our younger and older friends, along with a wish, may the upcoming holidays bring health, love and serenity to everyone and may Christ truly be born in our hearts… that’s the most important of all!

Hi.Happy Sunday. Thanks for sharing such an interesting festive post filled with lots of interesting information and golden Christmas nuggets. I am certain this post could have been made into three or four different posts. Just an idea to think about. Have a wonderful day. Goff
LikeLike
Thank you so much! We will be back with many more christmas stories!
LikeLiked by 1 person
Great Writing. Cheers. Goff
LikeLike
Great post
Thank you for sharing
LikeLike
Thank you very much!
LikeLiked by 1 person